This is steps to Installing & Connecting Ubuntu in VirtualBox
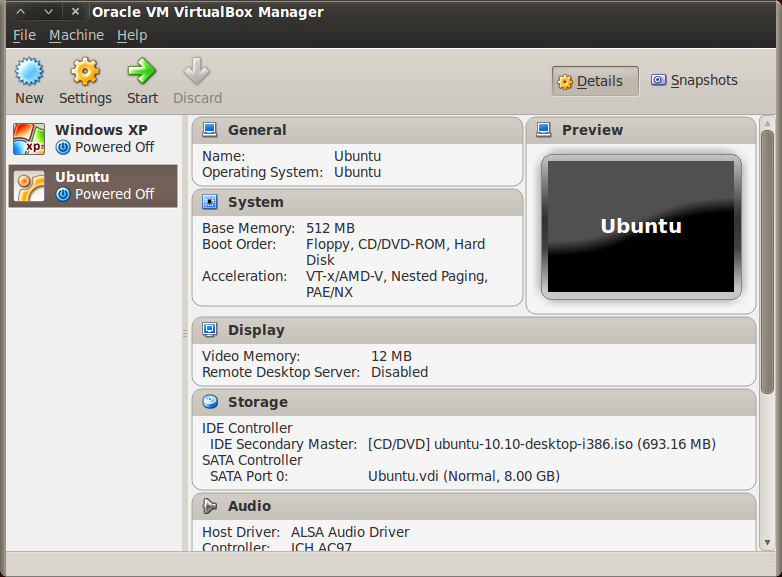
1. Firts step, open the VirtualBox Manager. Then click start to Create New Installation.

2. Then will open the dialog box to choose a descriptive name for the new virtual machine. Insert the Nama, choose the operating system and version. Click "Next" to continue.

3. After that we will select the amount of memory (RAM), we choose 512 that fit to the recommended size. Then click "Next".

4. The next step we will set the hard drive for virtual machine. We choose "Create a virtual hard drive now" for new installation, then click "Next"

5. Then we choose the file type for hard drive for new virtual hard drive. We choose VDI (VirtualBox Disk Image)

6. Then we choose storage on physical hard drive. We choose a fixed size that faster to use. Then click "Next".

7. After that we choose the location for Virtual Machine and set the size for virtual hard drive. We filled 8 GB for hard drive. Then click "Create" for create a new virtual machine. Then the VirtualBox will setup for new virtual machine.

8. Okay, all arrangements have been completed, and then we will install the system in a virtualbox. Click the name of virtual machine, then click "Start".

9. In this step we select start-up disk, and locate the ISO Ubuntu file.

10. Locate to the ISO Ubuntu file. And click "Open" to continue.

11. After locate the ISO file to the destination, then click "Start". And the VirtualBox will setup to installation.

12. And then we will navigate to the VirtualBox Manager. Click the "Ubuntu" that we want to install for begin the installation, then click "Start" button.
13. After that the screen installation will appear.

14. Firts window installation, choose the language, then click "Install Ubuntu".

15. Then the window suggestion for installation will appear. You can checklist the option if you want, then click "Forward" to continue.

16. Window for allocate drive space, choose the "Specify partitions manually (advanced)" for manually partitions then click forward.

17. Click the "New Partition Table"

18. Click "Continue" for continue the installation.

19. Then click the partition table that we create, and click "Add".

20. Insert the new partition size, we fill 8000MB, use as Ext 4, and set mount point to /. Then click Ok.

21. After the / mount point created, we use the available free space for create a swap. Click the "Free Space" then click Add.

22. Set the type for new partition to Logical, use as swap area, then click Ok.

23. Then click "Install Now" for begin the installation.

24. The system will setup for new installation.

25. Set the location where you are, we choose Jakarta. That use for to set the local time. Click "Forward" to continue.

26. Select the keyboard layout, we choose the USA. If you have a different types of keyboard, adjust the keyboard on your computer. Then click "Forward".

27. Insert the name and computer's name that you want, and select the password for your computer. Then click "Forward".

28. Then the setup for copying files will begin.

29. When first setup we choose Download updates when installing, so if the computer connect to the internet, then the installation will download updates.


30. After downloading the updates, then will installing language packs. Wait until finished.

31. When the installation completed, then the login dialog box will appear.


33. Ubuntu 10.10 succesfully installed in VirtualBox.

0 comments:
Post a Comment
Comment in here...